Introduction
I have covered the Magit Status interface in my last post
, which is the Magit equivalent of running git status. In this article I will go through two other very commonly used git workflows: staging and committing. Magit really excels at these, as we will see in the rest of this post.
Staging
Staging in Magit benefits from the intuitive Magit Status interface which adds a sense of responsiveness to the process. Staging or unstaging changes is instantly reflected in the same interface. It gives an impression of moving things around. Navigating through changes is as simple as moving the cursor around using the arrow keys, or the more efficient approach: using the keys n for next and p for previous to navigate through one change at a time.
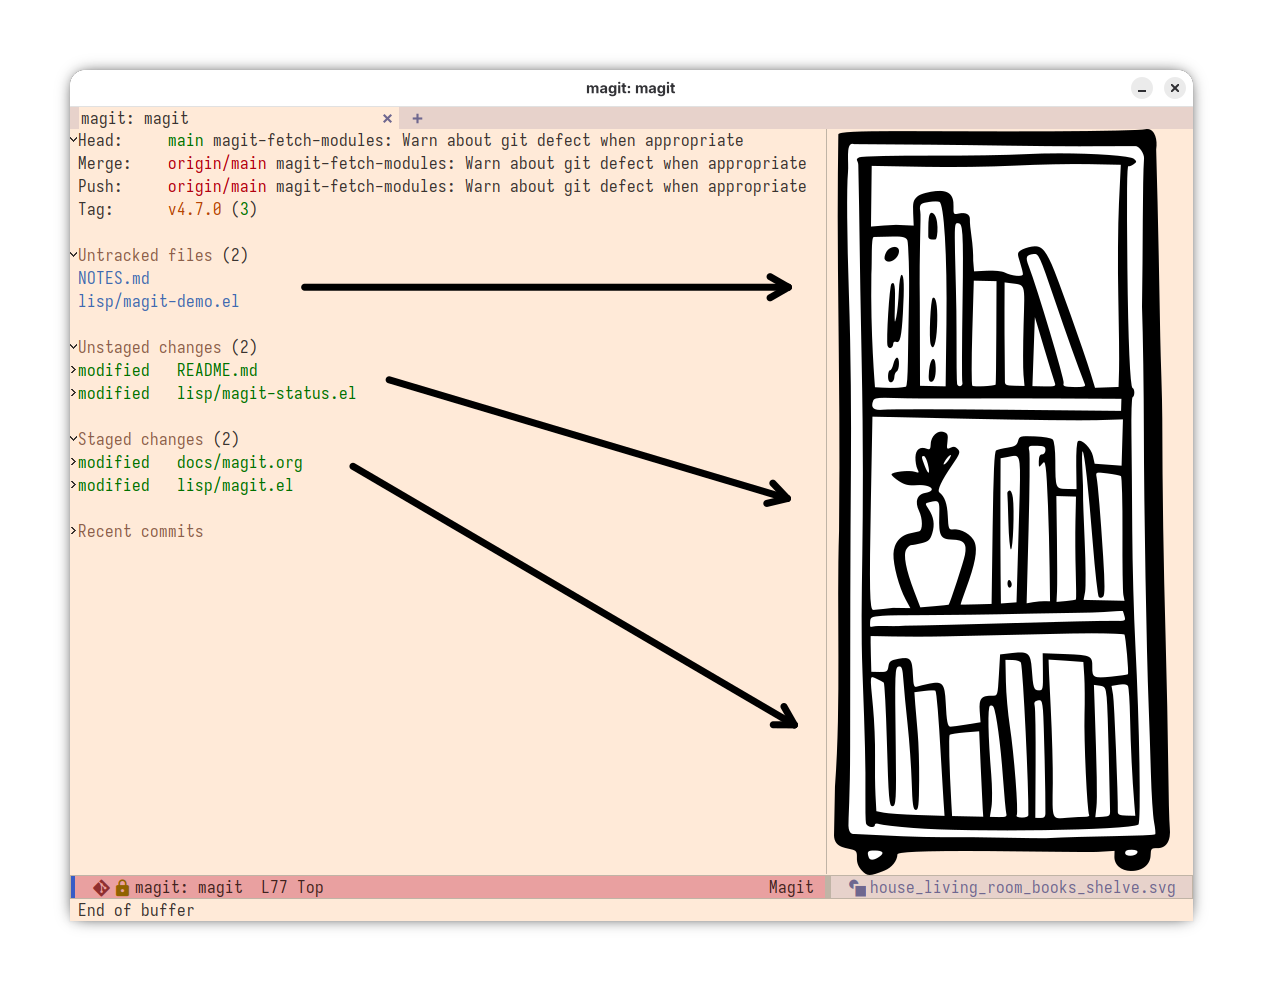
I like to imagine the 3 sections Untracked files, Unstaged changes and Staged changes as a 3-shelf drawer where each shelf represents a section and the objects in the shelf represent the changes that we would move around.
The best part about staging changes in Magit is that we only press the s key to stage literally anything, whether it is a single line, a hunk, a whole file or all changes (we can also use the capitalized letter S or U to stage or unstage all changes). The only difference is where we put the cursor before we press the s key. Staging a part of a hunk requires selecting the lines that we want to stage. Unstaging is performed in the same exact way except that we use the key u for unstaging. In addition to that we can also discard changes in a similar way using the key k. All these shortcuts are displayed in the help buffer for discovery.
Committing
This Git command is essentially straightforward. The changes should be already staged at this point, and we just need to save them and add a message to describe changes. Magit improves this workflow by adding more workflows related to commits. Let’s first check the Magit Commit menu in the following image which appears when we press the c key.
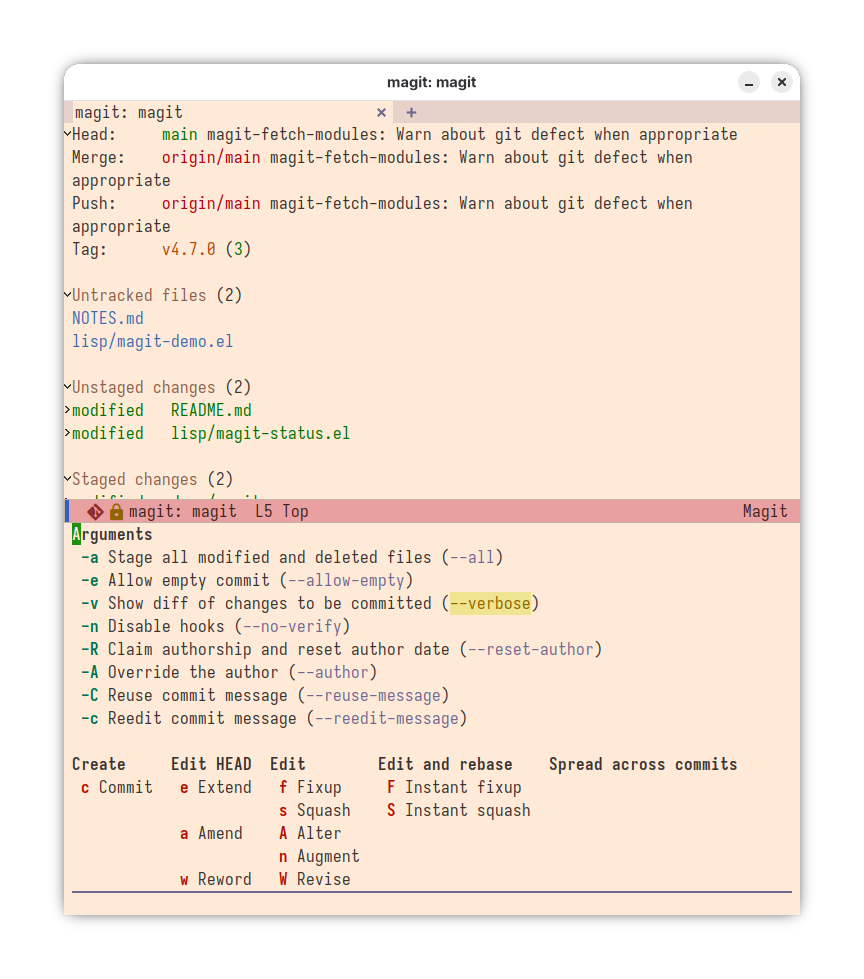
Magit Commit menu appears in the bottom half of the screen.
We will start with my favorite command Instant fixup, before going over the menu sections.
The Instant fixup command takes staged changes and adds them to any existing commit. For example, let’s imagine we introduced a new API route in commit A and then made a couple of commits (B and C) on top. Later we review the commits for this API and decide to rename the route, but that commit is now a few commits back, the tip is C. The easy way to fix it is to add a new commit D; the cleaner way is to fold the change into commit A and rewrite the history from A through C. But rebasing creates friction, and one would avoid it if not strictly necessary. Instant fixup takes the clean approach and simplifies it: trigger the command, indicate the commit to add the changes to, and that’s it. This makes commits very forgiving, any commit can be altered in just a few keystrokes. I have previously read an article making this point, comparing how commits feel mutable in Jujutsu VCS compared to Git. In reality Git allows similar mutability; it’s just hidden behind a couple of commands, and users tend to work around such pain points rather than figure out the proper way to achieve what they want.
The Arguments section above provides some flags that can be toggled for very specific use cases. For example, let’s say at some point we would like to make sure Git hooks are not executed when we commit our changes, we would just press the key - then n. We can also notice how Magit highlights the actual Git CLI flags for each argument, which helps new Git users get familiar with the flags provided by Git and also helps experienced Git users ensure they are using the right flag.
The Create section contains a single command: the commit command itself. When invoked, the screen splits in half, with the commit message prompt on one side and the diff of the changes to be committed on the other. The following image shows the commit creation interface.
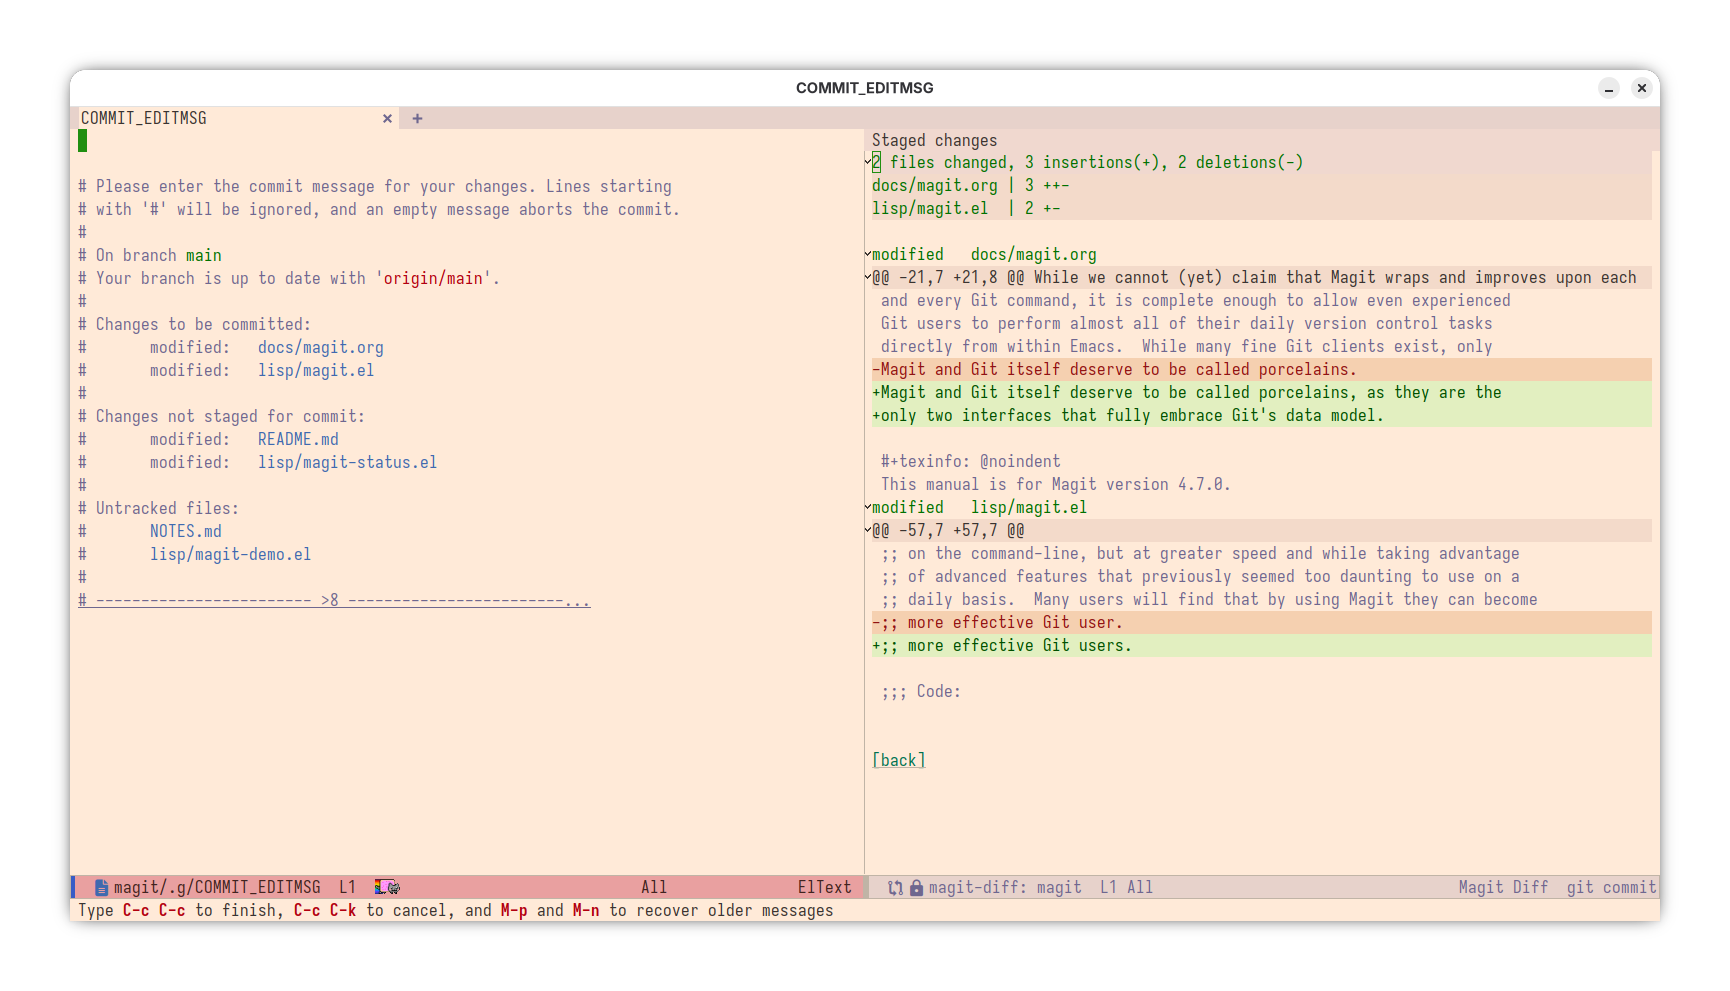
The commit message prompt and the diff of the changes to be committed.
The Edit HEAD section contains commands to modify the last commit in 3 different ways:
- Extend: Adds the staged changes to the last commit
- Amend: Adds the staged changes to the last commit and changes the commit message
- Reword: Changes the last commit’s message
I will not go through the remaining commands since I don’t use them often, but if you are curious you can check the official documentation .
Conclusion
Staging in Magit is very simple yet very efficient. Because it feels like selecting text, the process is very intentional: you pick exactly the parts you want to stage, with no stray lines or whitespace cluttering the commit. Committing also feels efficient but in a different way. I like how the immutability barrier is not relevant. It gives the possibility to easily push commits that describe the flow of implementation of a specific feature. What I also like about Magit in general is how it remains faithful to Git by following the same terminology, it’s also possible to check each command that was executed by Magit by simply pressing the key $.